Burning and Debugging Tools for TLSR9 Series
TLSR9_DEV_KEY is a portable debugging device, which works with Telink RDS IDE through JTAG interface supported by OpenOCD, it is applies to Telink TLSR9 series. It supports JTAG debug port interfaces, multiple JATG device through JATG debug port interface, the debug-on-reset.
Download Telink_v323_rds_official_windows
Prerequisite for Flash Programming
In order to use the JTAG function smoothly, users should ensure that the following conditions are met:
- The GPIO which corresponding to the JTAG function should be available in the program.
- After the program enters low-power mode, the JTAG can not work normally until the program exists this mode.
- If there is a program in flash, the JTAG fucntion may fail to work due to the above reasons. In this case, user can use Telink BDT to erase the flash. User can refer to the Burning and Debugging Tools for all Series for detailed instructions of the tool.
Diagnostic Report
In the event that the TLSR9 DEV KEY does not execute as expected, the IDE provides functions to easily diagnose the problem. If all test items pass, there is no problem with the hardware connection. Follow the steps below to obtain a diagnostic report for ICE or target.
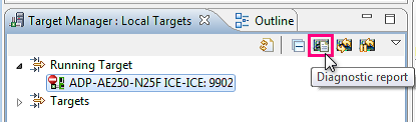
Step 1: In the Target Manager view, select the desired running target and click the “Diagnostic report” button on the toolbar.
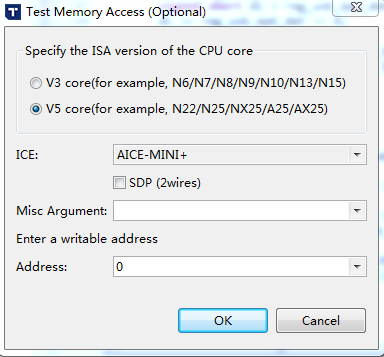
Step 2: Choose V5 core, uncheck “2wires”. Specify “address” to 0.
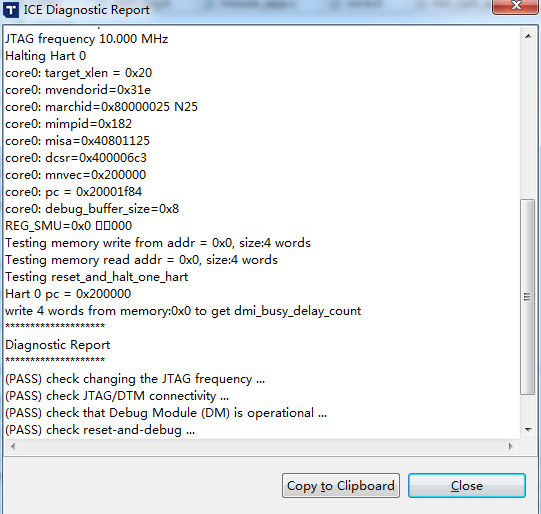
Step 3: The diagnostic report for the debugger will be generated and displayed in the dialog that pops up.
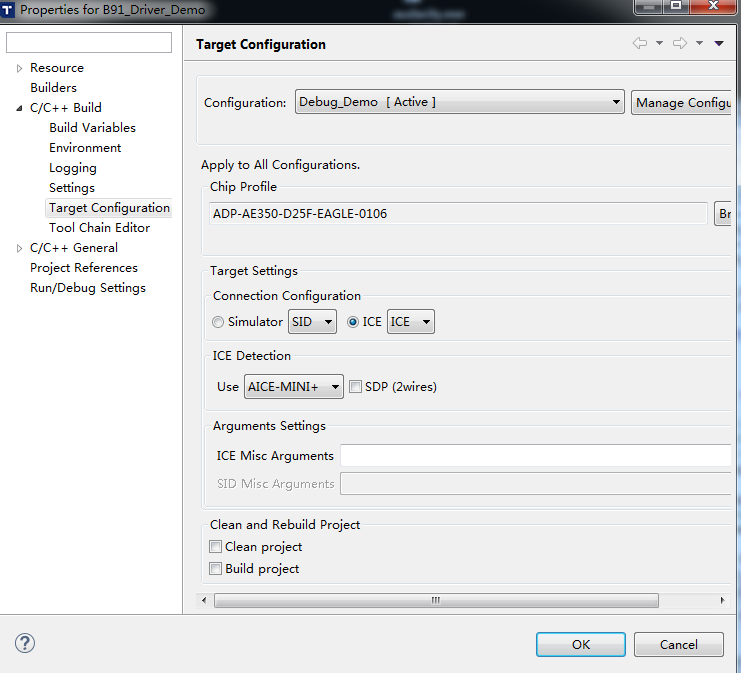
Target Configuration
Step 1: Right-click the project folder and select “Target Configuration” in the pull-down menu to invoke “Target Configuration.”

Step 2: Please don’t select the option “SDP (2 wires)” in this section.
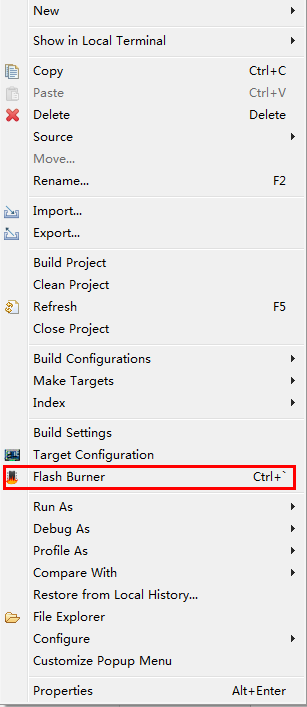
Flash Programming
Right-click the project folder and select “Flash Burner” in the pull-down menu to invoke the Flash Programming Wizard.
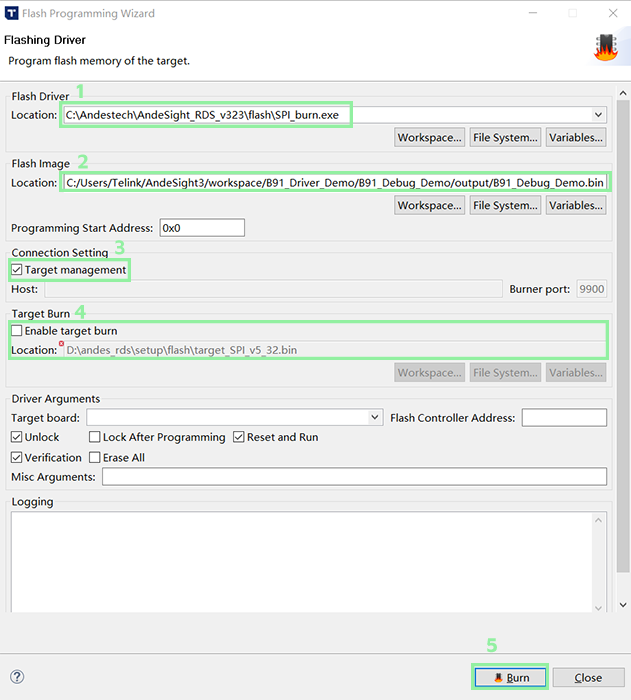
As shown in the figure below, make sure that “Verification” is selected, if you need to erase the flash before programming, please select “erase all” and perform the following steps. Erase all means erase all data and programs in the flash memory. When the log window displays “Verify success”, the burning is complete.
Step 1: Enter IDE_ROOT\flash\src-SPI_burn, choose SPI_burn.exe.
Step 2: Choose the bin file to download.
Step 3: Check the “Target management”.
Step 4: Check the “Target Burn” and Do not specify location. Then uncheck “Target Burn” since it is not involved.
Step 5: Click “Burn” button to download the bin file.
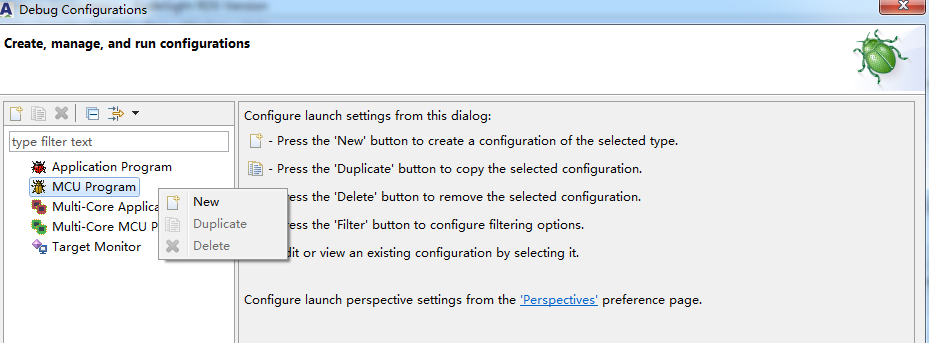
Application Debug
Step 1: Right-click the project folder and select “Debug As” in the pull-down menu to invoke “Debug Configurations.”

Step 2: In the invoked Debug Configurations dialog, right-click “MCU Program,” and select “New” from the pull-down menu to create a debug configuration.
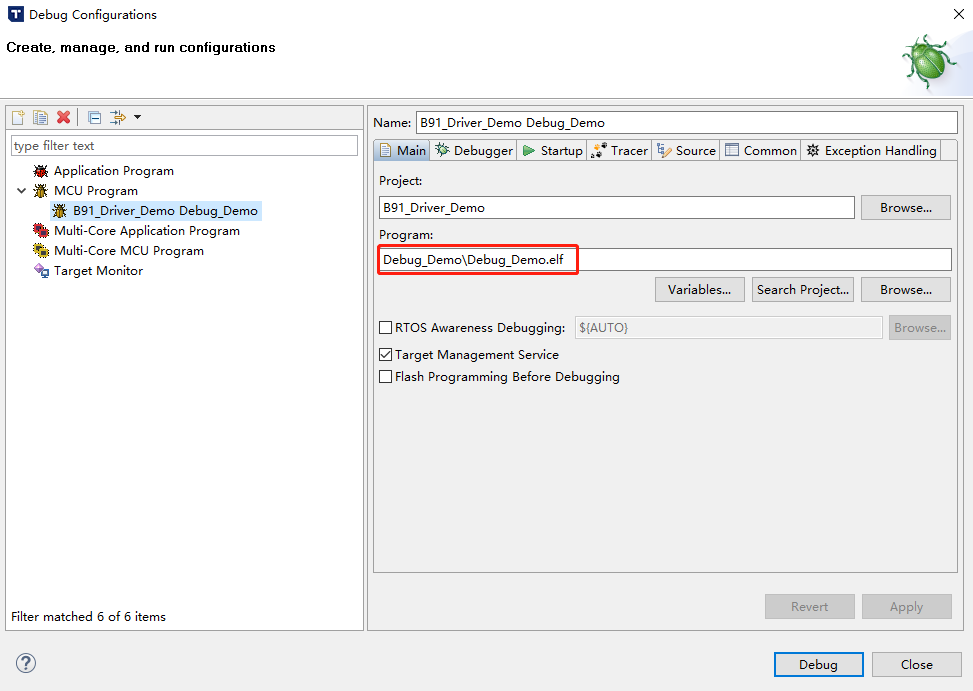
Step 3: In the Debug Configuration dialog, please select program under the Main tab:
- Project: Specify a project for the debug session.
- Program: Specify the boot code file with the symbol information.
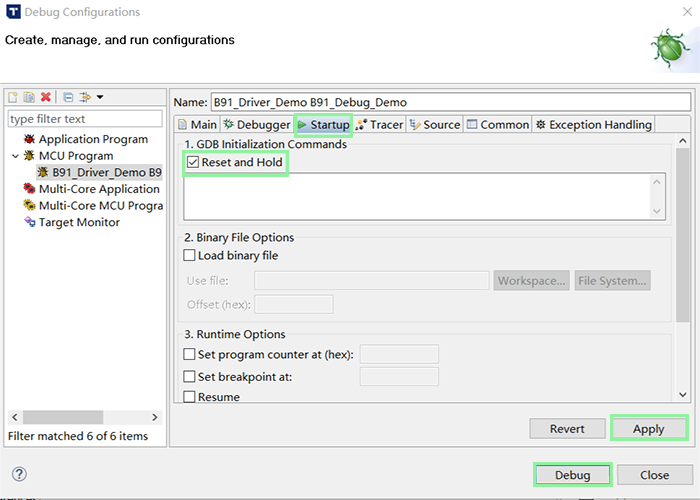
Step 4: Select “Reset and Hold” in Startup tab, then Click “Apply” and “Debug” to launch the MCU Program debug session.
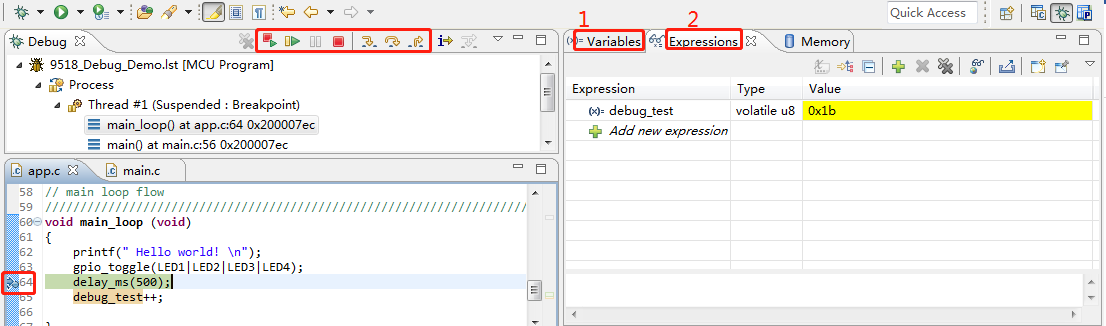
Step 5: The Debug perspective is invoked automatically. Click toolbar buttons on the Debug view to observe the results in other views (e.g., the Variables view , Expressions view …).
- “Variables”: This view lists information about the variables associated with the stack frame selected in the Debug view. When program execution is suspended, changes in variable values are highlighted.
- “Expressions”: Global variables are displayed in the expressions view. Updated values of monitored global variables are highlighted in yellow.